close
When you use a Static IP service like QuotaGuard Static or QuotaGuard Shield for Heroku, you are get a load balanced set of static IP addresses to route either inbound or outbound traffic through to your desired destination - no server setup or ongoing maintenance required.
All you need to do is tweak your Heroku config to direct your inbound or outbound requests through our provided proxy server. We handle the high availability, the fail-over requirements, proxy maintenance, and the load balancing for your Heroku app.
Both Heroku Static IP QuotaGuard products are available on the Heroku Add-Ons marketplace, where you can configure your QuotaGuard Static IP addresses to your Heroku app, in one click, with no need to change the core of your code.
Over the past few days, Michael and Tim troubleshooted my QGTunnel connection. Though the problem ended up being on my side, they were careful, understanding, and empathetic. They responded within 30 minutes of each email I sent, while I expected at least a couple of hours. Tim was even kind enough to go through my Heroku project to find potential bugs that could’ve caused my issue.
I’ll continue working with/recommending QuotaGuard to anyone using Heroku to connect to a DB with allow-listed IPs.
Tim S. – Data Scientist for IHeartJane.com
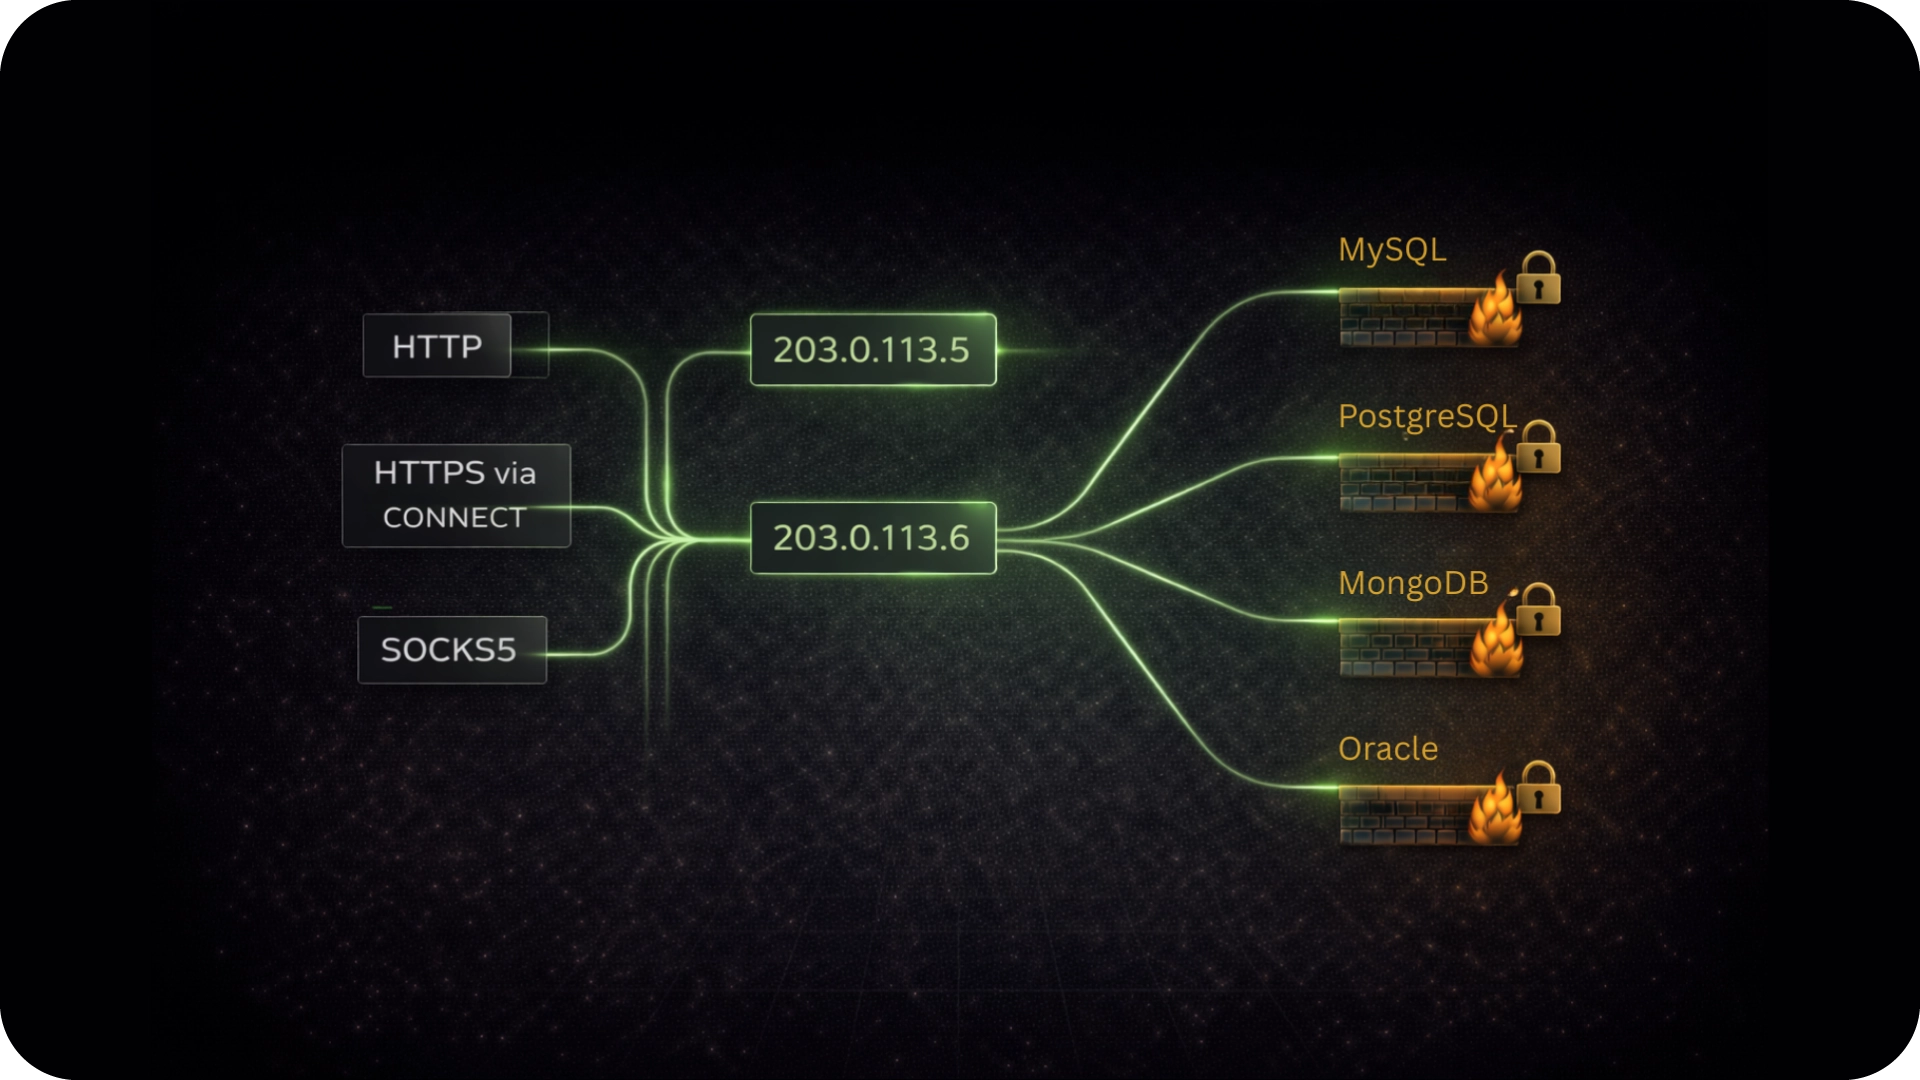
Heroku’s QuotaGuard Static IP solution routes your traffic through a pair of static IP addresses that never change. It should be used if you need your traffic to pass through a known IP address for the purpose of firewall ingress rules or application allow-listing with a third party.
QG Static uses HTTP and SOCKS5 for outbound service and SSL Termination for inbound service.
Check out QuotaGuard Static on HerokuHeroku’s QuotaGuard Shield Static IP solution is HIPAA compliant and built to handle traffic that contains PII and other sensitive information. QG Shield routes your traffic through a pair of static IP addresses that never change with a higher level of security over QuotaGuard Static.
QG Shield uses HTTPS for outbound service and SSL Passthrough for inbound service. Like QuotaGuard Static, QuotaGuard Shield should be used if you need your traffic to pass through a known IP address for the purpose of firewall ingress rules or application allow-listing with a third party. Shield allows you to utilize Heroku’s ACM for your site or bring your own certificate, like from Let’s Encrypt.
Check out QuotaGuard Shield on HerokuWhat’s the difference between SSL Termination and SSL Passthrough?
We cover that here in the article
The primary benefit of using Heroku as your app platform is Heroku’s horizontal scalability, however, what if you need to:
Heroku does not provide Static IP addresses in the Common Runtime Environment. In Heroku Private Spaces, for which the pricing goes to thousands of dollars a month, Static IP’s are available, but they aren’t load balanced, run on dedicated proxies, or highly customizable.
Tp allow-list protected resources, access restricted databases, or integrate with 3rd party API’s, you are going to need to use a hosted Heroku Static IP provider, like QuotaGuard.
Lower Latency
Regional Efficiencies
Keep Your Data Close to Home
Dedicated Heroku Static IP Proxies Available in Each Region
You will receive two exclusive IP addresses, as part of our fail-proof, load balancing service. At any given point, traffic may be directed through either one of these addresses.
Upon provisioning the add-on, your two IP addresses will be displayed on the command line. Alternatively, you can also access them through your QuotaGuard Static dashboard, which is easily accessible from your Heroku App page.
You can securely access HTTPS services through the HTTP proxy. When a request is made to an HTTPS endpoint, your client will automatically send a CONNECT request, rather than a basic GET or POST request.
Upon receiving the CONNECT request, the proxy will establish a connection between your client and the endpoint, allowing your client to establish a standard SSL session with the endpoint. This ensures that all traffic transmitted between your client and the endpoint is encrypted, providing the same level of security as if you had connected directly.
For an even more secure HTTPS proxy, consider using QuotaGuard Shield. With the HTTPS Proxy, your initial CONNECT request will also be encrypted, providing additional protection for your proxy credentials and the remote hostname. However, this does require an extra TLS handshake.
Ruby provides a great REST client that enables you to specify HTTP requests. You can run the below example in an irb session and verify that the final IP returned is one of your two static IPs. require “rest-client”
RestClient.proxy = ENV["QUOTAGUARDSTATIC_URL"]
res = RestClient.get("http://ip.quotaguard.com")
puts "Your Static IP is: #{res.body}"
Using Requests Requests provides an excellent Python HTTP library, allowing you to specify an authenticated proxy on a per request basis so you can pick and choose when to route through your static IP.
import requests
import os
proxies = {
"http": os.environ['QUOTAGUARDSTATIC_URL'],
"https": os.environ['QUOTAGUARDSTATIC_URL']
}
res = requests.get("http://ip.quotaguard.com/", proxies=proxies)
print(res.text)
Using urllib2
urllib2 is a more basic library used for HTTP communication in Python and uses environment variables to set a proxy service.
In your application initialization you should set the http_proxy variable to match the QUOTAGUARDSTATIC_URL.
# Assign QuotaGuard to your environment's http_proxy variable
os.environ['http_proxy'] = os.environ['QUOTAGUARDSTATIC_URL']
You can test in the Python interpreter as below:
import urllib2, os
os.environ['http_proxy'] = os.environ['QUOTAGUARDSTATIC_URL']
url = 'http://ip.quotaguard.com/'
proxy = urllib2.ProxyHandler()
opener = urllib2.build_opener(proxy)
in_ = opener.open(url)
res = in_.read()
print(res)
To access an HTTP API you can use the standard HTTP library in Node.js but must ensure you correctly set the “Host” header to your target hostname, not the proxy hostname.
var http, options, proxy, url;
http = require("http");
url = require("url");
proxy = url.parse(process.env.QUOTAGUARDSTATIC_URL);
target = url.parse("http://ip.quotaguard.com/");
options = {
hostname: proxy.hostname,
port: proxy.port || 80,
path: target.href,
headers: {
"Proxy-Authorization": "Basic " + (new Buffer(proxy.auth).toString("base64")),
"Host" : target.hostname
}
};
http.get(options, function(res) {
res.pipe(process.stdout);
return console.log("status code", res.statusCode);
});
The standard Node.js HTTPS module does not handle making requests through a proxy very well. If you need to access an HTTPS API, we recommend using request modules (npm install request).
var request = require('request');
var options = {
proxy: process.env.QUOTAGUARDSTATIC_URL,
url: 'https://api.github.com/repos/joyent/node',
headers: {
'User-Agent': 'node.js'
}
};
function callback(error, response, body) {
if (!error && response.statusCode == 200) {
console.log(body);
}
}
request(options, callback);
The JVM allows you to configure a socksProxyHost. The example below uses Apache HttpClient, but the same configuration applies to other JVM-based clients.
import java.net.*;
import java.io.*;
public class HelloWorld {
public static void main(String []args) throws IOException {
URL proxyUrl = new URL(System.getenv("QUOTAGUARDSTATIC_URL"));
String userInfo = proxyUrl.getUserInfo();
String user = userInfo.substring(0, userInfo.indexOf(':'));
String password = userInfo.substring(userInfo.indexOf(':') + 1);
URLConnection conn = null;
System.setProperty("http.proxyHost", proxyUrl.getHost());
System.setProperty("http.proxyPort", Integer.toString(proxyUrl.getPort()));
Authenticator.setDefault(new Authenticator() {
protected PasswordAuthentication getPasswordAuthentication() {
return new PasswordAuthentication(user, password.toCharArray());
}
});
URL url = new URL("http://ip.quotaguard.com");
conn = url.openConnection();
BufferedReader in = new BufferedReader(new InputStreamReader(conn.getInputStream()));
String inputLine;
while ((inputLine = in.readLine()) != null)
System.out.println(inputLine);
in.close();
}
}
In the event that your Heroku app relies on DNS-based discovery or requires the ability for local tunnels to be resolvable through DNS name, regular tunneling may not suffice. In such cases, activating the transparent mode for QGTunnel in your configuration is recommended. This mode allows QGTunnel to modify DNS queries originating from your application to the designated local address. Let’s say you want to access replicated MongoDB cluster using QGTunnel with 3 replicas located on the hosts:
rs01.mongodb.net:52115,
rs02.mongodb.net:52115 and
rs1.mongodb.net:52115.
For this configuration you will need to create 3 separate tunnels for each host on the port 52115 in transparent mode. Once this is done, QGTunnel will alter DNS resolution process to resolve these host names to the appropriate loopback address and auto discovery for your replicated cluster should work as intended.
If you would like more guidance on which QuotaGuard Heroku Static IP service is right for you, please send us an email.